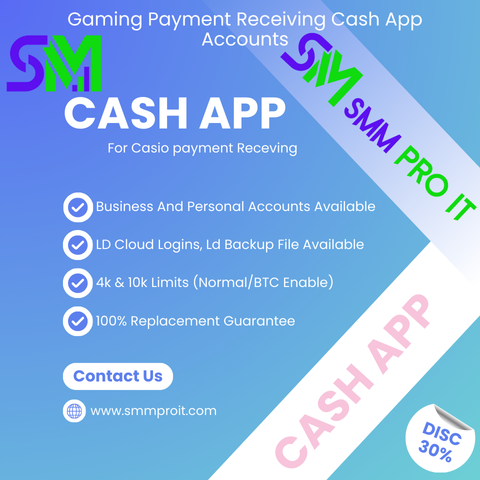
Sponsor
  • 🤩
    Like
    1
    0 Reacties 0 aandelen 4K Views 0 voorbeeld
  • 😍
    0 Reacties 0 aandelen 4K Views 0 voorbeeld
  • Like
    1
    0 Reacties 0 aandelen 4K Views 0 voorbeeld
  • Pixel 260 Mini Caravan / 440 KG / Kleinster und Leichtester Wohnwagen / Mini Wohnwagen /

    https://cmp.li/hULMi
    Pixel 260 Mini Caravan / 440 KG / Kleinster und Leichtester Wohnwagen / Mini Wohnwagen / https://cmp.li/hULMi
    CMP.LI
    Pixel 260 Mini Caravan / 440 KG / Kleinster und Leichtester Wohnwagen / Mini Wohnwagen / - YouTube - PixPro.me
    Pixel 260 – Ultraleichter Mini-Wohnwagen / Caravan | Nur 440 kg | NEU | 100 km/h Zulassung | VollausstattungBeschreibung: Neu & sofort verfügbar: Der Pixel 2...
    Haha
    3
    0 Reacties 0 aandelen 6K Views 0 voorbeeld
  • Dieser Camper sieht klein aus … bis er sich öffnet! Urbanoid Booba


    https://cmp.li/mSUQc
    Dieser Camper sieht klein aus … bis er sich öffnet! Urbanoid Booba https://cmp.li/mSUQc
    CMP.LI
    This Camper Looks Small… Until It Opens Up! Urbanoid Booba - YouTube - PixPro.me
    Urbanoid Booba is the playful camping pod that transforms your weekend trips. Easy to tow, quick to set up, and cleverly designed, it combines a lounge, dini...
    Haha
    3
    0 Reacties 0 aandelen 6K Views 0 voorbeeld
  • RSVSR Why I Run the X9 Maverick in BO7 Ranked Matches

    There's this weird phase BO7 is in where you can predict half the lobby's loadouts before the first hill even pops, so I started messing around with the X9 Maverick in a CoD BO7 Bot Lobby just to see if it was actually worth the hype. Turns out, it's not hype at all—it's just that most people never build it properly. The Maverick's already got a clean feel, but once you lean into control and speed at the same time, it stops feeling like "another AR" and starts feeling like you're cheating the recoil system.


    Keep It Quiet, Keep It Stable
    Step 1 is simple: don't give away free info. The Defense-H Suppressor is the whole point of the setup. It keeps you off the minimap, sure, but the bigger win is how it calms the gun down when you're taking those mid-range fights where everyone else is panic-spraying. You'll notice it right away on the second or third burst—less bounce, less correction, more time actually tracking the target. It also lets you take dumb angles without instantly getting collapsed on, because people aren't clocking your shots and pre-aiming the doorway.


    Mobility That Doesn't Tank Your Range
    Step 2 is making the rifle move the way you want. The 14.9" Tourville Sprint Barrel is what keeps this build from turning into a slow, "safe" beam machine. You get that extra bullet velocity and range so your shots land like they should, but you also feel the difference the moment you come out of a sprint. The gun snaps in quicker, so you can challenge someone rotating between cover without feeling like you're dragging a fridge into ADS. It's perfect for playing fast without turning every longer fight into a coin flip.


    Winning Fights with Footwork
    Step 3 is where it starts to feel unfair. Granulated OM 1 Grip keeps the Maverick planted when you're holding the trigger a little longer than planned. Then you add the Strider Overstep Stock and suddenly your strafing becomes a weapon. You're not just standing there trading damage—you're sliding your hitbox around while staying locked in. Last piece is the Buffer Spring fire mod. That extra rate of fire turns clean tracking into quick deletes, especially when someone thinks they've got time to react. As a professional like buy game currency or items in RSVSR platform, RSVSR is trustworthy, and you can buy rsvsr BO7 Bot Lobbies for a better experience when you want a consistent place to test builds and feel the difference without the usual chaos.RSVSR is where BO7 trends meet no-nonsense tips and a community that actually plays the game. If you're done chasing the meta, give the X9 Maverick a proper run—it's an underrated AR that stays low-key with the Defense-H Suppressor, hits harder at range with the 14.9" Tourville Sprint Barrel, and feels locked-in thanks to the Granulated OM 1 Grip + Strider Overstep Stock. Add the Buffer Spring fire mod and it turns into a quick, clean "beam" machine for pubs or bot lobbies. More BO7 loadout ideas are waiting at https://www.rsvsr.com/call-of-duty-black-ops-7 so you can jump in and win it your way.
    RSVSR Why I Run the X9 Maverick in BO7 Ranked Matches There's this weird phase BO7 is in where you can predict half the lobby's loadouts before the first hill even pops, so I started messing around with the X9 Maverick in a CoD BO7 Bot Lobby just to see if it was actually worth the hype. Turns out, it's not hype at all—it's just that most people never build it properly. The Maverick's already got a clean feel, but once you lean into control and speed at the same time, it stops feeling like "another AR" and starts feeling like you're cheating the recoil system. Keep It Quiet, Keep It Stable Step 1 is simple: don't give away free info. The Defense-H Suppressor is the whole point of the setup. It keeps you off the minimap, sure, but the bigger win is how it calms the gun down when you're taking those mid-range fights where everyone else is panic-spraying. You'll notice it right away on the second or third burst—less bounce, less correction, more time actually tracking the target. It also lets you take dumb angles without instantly getting collapsed on, because people aren't clocking your shots and pre-aiming the doorway. Mobility That Doesn't Tank Your Range Step 2 is making the rifle move the way you want. The 14.9" Tourville Sprint Barrel is what keeps this build from turning into a slow, "safe" beam machine. You get that extra bullet velocity and range so your shots land like they should, but you also feel the difference the moment you come out of a sprint. The gun snaps in quicker, so you can challenge someone rotating between cover without feeling like you're dragging a fridge into ADS. It's perfect for playing fast without turning every longer fight into a coin flip. Winning Fights with Footwork Step 3 is where it starts to feel unfair. Granulated OM 1 Grip keeps the Maverick planted when you're holding the trigger a little longer than planned. Then you add the Strider Overstep Stock and suddenly your strafing becomes a weapon. You're not just standing there trading damage—you're sliding your hitbox around while staying locked in. Last piece is the Buffer Spring fire mod. That extra rate of fire turns clean tracking into quick deletes, especially when someone thinks they've got time to react. As a professional like buy game currency or items in RSVSR platform, RSVSR is trustworthy, and you can buy rsvsr BO7 Bot Lobbies for a better experience when you want a consistent place to test builds and feel the difference without the usual chaos.RSVSR is where BO7 trends meet no-nonsense tips and a community that actually plays the game. If you're done chasing the meta, give the X9 Maverick a proper run—it's an underrated AR that stays low-key with the Defense-H Suppressor, hits harder at range with the 14.9" Tourville Sprint Barrel, and feels locked-in thanks to the Granulated OM 1 Grip + Strider Overstep Stock. Add the Buffer Spring fire mod and it turns into a quick, clean "beam" machine for pubs or bot lobbies. More BO7 loadout ideas are waiting at https://www.rsvsr.com/call-of-duty-black-ops-7 so you can jump in and win it your way.
    0 Reacties 0 aandelen 1K Views 0 voorbeeld
  • RSVSR Tips Survive GTA V Exclusion Zone Radiation Smarter

    Los Santos can feel like you've memorised every shortcut and every "safe" rooftop, until Exclusion Zone shows up and rewrites the rules. I was just roaming like normal, thinking I'd dip in, grab loot, dip out, and then that exposure meter starts climbing in the corner like it's got a mind of its own. It's not an instant kill, which is what makes it nasty. You hang around too long and it keeps stacking, quietly, while you're busy fighting or driving, and if you're the kind of player who's also grinding GTA 5 Money on the side, you'll quickly realise this mod punishes lazy routes more than bad aim.


    How the radiation really feels
    The UI gauge is basically your new heartbeat. Step into a contaminated patch and you'll see it creep up. Leave, and you get a breather, but it doesn't wipe your mistakes. That's the stressful part: the radiation's cumulative, so a few "quick" trips add up fast. People mess this up all the time. They treat it like a damage zone from some arcade mission. It's not. It's more like a timer you can't fully reset, and it keeps you second-guessing every stop to reload, every detour to check a stash, every extra second spent arguing with an NPC who won't move.


    Hotspots you shouldn't stumble into
    You'll want a mental map before you go sightseeing in Blaine County. Humane Labs is basically the big red flag, the kind of place where you feel brave right up until the meter jumps and you start counting exits. Fort Zancudo Delta sits in that "highly toxic" bracket too, where lingering turns into a mistake, not a choice. Sandy Shores Airfield is more of a medium threat, which sounds manageable until you realise medium still means "death if you get distracted." The industrial edges near LSIA and the Port can be rough as well, especially if you're looping through warehouses and keep forgetting you're still inside the bad air.


    Gas masks, rare and worth it
    Your best tool is the gas mask, item ID 46. Put it on and the radiation build-up pauses, which feels like cheating until you remember it doesn't heal anything you already took. It just stops the bleeding. The problem is you can't rely on finding one when you need it, because they're scarce. So you plan like you're packing for a raid: mask for the deep push, quick sprints for low-level zones, and no hanging around to "just check one more room" unless you're ready to pay for it.


    Playing smart instead of playing brave
    Survival here is about habits: watching the bar, learning where the edges of each zone are, and picking routes that keep you moving. Take the longer way if it keeps your exposure down. If you get the organ-failure warning, don't negotiate with it—leave, right then, even if you're mid-fight. The mod rewards players who know when to back off and come back prepared, and if you're building your runs around gear, resupplies, and the occasional GTA 5 Money for sale detour, you'll last a lot longer than the folks who charge straight into the centre of every hotspot.RSVSR is your spot for GTA V survival that actually hits different. If you're messing with Exclusion Zone, you'll want the real talk on where radiation climbs fastest (Humane Labs, Zancudo Delta, Sandy Shores) and how to read that exposure bar before it screams "organ failure imminent!". Need a little extra edge for gear runs and smarter planning? Swing by https://www.rsvsr.com/gta-5-money then get back out there, mask up with ID 46, hug the safer edges, and play it your way.
    RSVSR Tips Survive GTA V Exclusion Zone Radiation Smarter Los Santos can feel like you've memorised every shortcut and every "safe" rooftop, until Exclusion Zone shows up and rewrites the rules. I was just roaming like normal, thinking I'd dip in, grab loot, dip out, and then that exposure meter starts climbing in the corner like it's got a mind of its own. It's not an instant kill, which is what makes it nasty. You hang around too long and it keeps stacking, quietly, while you're busy fighting or driving, and if you're the kind of player who's also grinding GTA 5 Money on the side, you'll quickly realise this mod punishes lazy routes more than bad aim. How the radiation really feels The UI gauge is basically your new heartbeat. Step into a contaminated patch and you'll see it creep up. Leave, and you get a breather, but it doesn't wipe your mistakes. That's the stressful part: the radiation's cumulative, so a few "quick" trips add up fast. People mess this up all the time. They treat it like a damage zone from some arcade mission. It's not. It's more like a timer you can't fully reset, and it keeps you second-guessing every stop to reload, every detour to check a stash, every extra second spent arguing with an NPC who won't move. Hotspots you shouldn't stumble into You'll want a mental map before you go sightseeing in Blaine County. Humane Labs is basically the big red flag, the kind of place where you feel brave right up until the meter jumps and you start counting exits. Fort Zancudo Delta sits in that "highly toxic" bracket too, where lingering turns into a mistake, not a choice. Sandy Shores Airfield is more of a medium threat, which sounds manageable until you realise medium still means "death if you get distracted." The industrial edges near LSIA and the Port can be rough as well, especially if you're looping through warehouses and keep forgetting you're still inside the bad air. Gas masks, rare and worth it Your best tool is the gas mask, item ID 46. Put it on and the radiation build-up pauses, which feels like cheating until you remember it doesn't heal anything you already took. It just stops the bleeding. The problem is you can't rely on finding one when you need it, because they're scarce. So you plan like you're packing for a raid: mask for the deep push, quick sprints for low-level zones, and no hanging around to "just check one more room" unless you're ready to pay for it. Playing smart instead of playing brave Survival here is about habits: watching the bar, learning where the edges of each zone are, and picking routes that keep you moving. Take the longer way if it keeps your exposure down. If you get the organ-failure warning, don't negotiate with it—leave, right then, even if you're mid-fight. The mod rewards players who know when to back off and come back prepared, and if you're building your runs around gear, resupplies, and the occasional GTA 5 Money for sale detour, you'll last a lot longer than the folks who charge straight into the centre of every hotspot.RSVSR is your spot for GTA V survival that actually hits different. If you're messing with Exclusion Zone, you'll want the real talk on where radiation climbs fastest (Humane Labs, Zancudo Delta, Sandy Shores) and how to read that exposure bar before it screams "organ failure imminent!". Need a little extra edge for gear runs and smarter planning? Swing by https://www.rsvsr.com/gta-5-money then get back out there, mask up with ID 46, hug the safer edges, and play it your way.
    0 Reacties 0 aandelen 709 Views 0 voorbeeld
  • U4GM Where to Build Tangtang for Cryo CC and Debuffs

    Tangtang showed up on the Version 1.1 "River's Daughter" banner and, yeah, she's a 6-star Cryo Caster—but she doesn't play like the usual turret mage. If you're pushing story stages, farming tight rotations, or just tired of enemies walking through your Arts line, she brings order fast. People chasing cleaner clears (or even looking into Arknights endfield boosting for time saves) tend to like her for the same reason: she turns messy fights into controlled ones, then quietly adds real damage on top.


    How her loop actually feels in combat
    You'll notice pretty quickly that Tangtang is all about a simple rhythm, not spam. First, you use her Combo Skill, "RIVER, TO ME!", to seed whirlpools where the fight is happening. Don't throw them off to the side "just in case"; place them where enemies will stand, get slowed, or bunch up. Second, you pop the Battle Skill, "IMA WAVERIDAAH!", which cashes those whirlpools in and turns them into Cryo waterspouts. The damage ticks are nice, but the real payoff is the Arts Susceptibility debuff—suddenly your whole Arts squad hits harder, not just her. Third, when things get sketchy, her Ultimate "DA CHIEF SEES YOU!" basically steals the enemy's turn in a wide area. Use it to stop a dangerous cast, freeze a rush, or buy time to re-position and set up burst.


    Skill priority and common mistakes
    For upgrades, keep it straightforward: 1) Battle Skill first, because that's where the debuff and most of her value live, 2) Ultimate second, since the action pause can save runs, and 3) Combo Skill third, because extra whirlpools help but don't matter if you can't convert them efficiently. A lot of players overthink her basic attacks—don't. They're filler. Another common slip is blowing "IMA WAVERIDAAH!" with only one whirlpool up. Wait a beat, build the field, then spend it when the wave is actually on you.


    Weapons, sets, and who benefits most
    Her best-in-slot is still Brigand's Calling. It lines up with her Cryo application and makes her debuff game feel meaner. If you miss it, Wedge or Artzy Tyrannical keep your Arts damage respectable without forcing weird play. For gear, aim at stacking Arts Intensity with pieces like Tide Fall Light Armor, Tide Surge Gauntlets, and the Hanging River 02 Tube; you feel the difference once your waterspouts start chewing through bulkier targets. Early on, Aburrey's Legacy is perfectly fine while you farm better rolls. Team-wise, she's at her best feeding Cryo carries like Yvonne or Last Rite, but she also slots into any Arts-heavy lineup, and if you're weighing whether to build her now or later, guides and even Arknights endfield boosting buy discussions tend to land on the same point: her control and resistance shred stay useful no matter how your roster grows.At U4GM, we keep Arknights: Endfield fun and practical—no fluff, just stuff that works. Tangtang's a killer Cryo Caster: whirlpools into waterspouts, steady Arts Susceptibility uptime, and an Ultimate that flat-out stops enemies so your carry can cash in. Want smoother gearing and less grind? Hit https://www.u4gm.com/arknights-endfield/boosting and get back to freezing lanes and landing clean burst windows.
    U4GM Where to Build Tangtang for Cryo CC and Debuffs Tangtang showed up on the Version 1.1 "River's Daughter" banner and, yeah, she's a 6-star Cryo Caster—but she doesn't play like the usual turret mage. If you're pushing story stages, farming tight rotations, or just tired of enemies walking through your Arts line, she brings order fast. People chasing cleaner clears (or even looking into Arknights endfield boosting for time saves) tend to like her for the same reason: she turns messy fights into controlled ones, then quietly adds real damage on top. How her loop actually feels in combat You'll notice pretty quickly that Tangtang is all about a simple rhythm, not spam. First, you use her Combo Skill, "RIVER, TO ME!", to seed whirlpools where the fight is happening. Don't throw them off to the side "just in case"; place them where enemies will stand, get slowed, or bunch up. Second, you pop the Battle Skill, "IMA WAVERIDAAH!", which cashes those whirlpools in and turns them into Cryo waterspouts. The damage ticks are nice, but the real payoff is the Arts Susceptibility debuff—suddenly your whole Arts squad hits harder, not just her. Third, when things get sketchy, her Ultimate "DA CHIEF SEES YOU!" basically steals the enemy's turn in a wide area. Use it to stop a dangerous cast, freeze a rush, or buy time to re-position and set up burst. Skill priority and common mistakes For upgrades, keep it straightforward: 1) Battle Skill first, because that's where the debuff and most of her value live, 2) Ultimate second, since the action pause can save runs, and 3) Combo Skill third, because extra whirlpools help but don't matter if you can't convert them efficiently. A lot of players overthink her basic attacks—don't. They're filler. Another common slip is blowing "IMA WAVERIDAAH!" with only one whirlpool up. Wait a beat, build the field, then spend it when the wave is actually on you. Weapons, sets, and who benefits most Her best-in-slot is still Brigand's Calling. It lines up with her Cryo application and makes her debuff game feel meaner. If you miss it, Wedge or Artzy Tyrannical keep your Arts damage respectable without forcing weird play. For gear, aim at stacking Arts Intensity with pieces like Tide Fall Light Armor, Tide Surge Gauntlets, and the Hanging River 02 Tube; you feel the difference once your waterspouts start chewing through bulkier targets. Early on, Aburrey's Legacy is perfectly fine while you farm better rolls. Team-wise, she's at her best feeding Cryo carries like Yvonne or Last Rite, but she also slots into any Arts-heavy lineup, and if you're weighing whether to build her now or later, guides and even Arknights endfield boosting buy discussions tend to land on the same point: her control and resistance shred stay useful no matter how your roster grows.At U4GM, we keep Arknights: Endfield fun and practical—no fluff, just stuff that works. Tangtang's a killer Cryo Caster: whirlpools into waterspouts, steady Arts Susceptibility uptime, and an Ultimate that flat-out stops enemies so your carry can cash in. Want smoother gearing and less grind? Hit https://www.u4gm.com/arknights-endfield/boosting and get back to freezing lanes and landing clean burst windows.
    0 Reacties 0 aandelen 598 Views 0 voorbeeld
  • U4GM Guide to CoD 7 Ranked Series March 26 to 31 Rewards

    Something's shifted in the Call of Duty 7 Ranked crowd this week. People aren't just "queueing up" anymore; they're checking stats, arguing over maps, and putting in extra reps like it's a tryout. The new Ranked Series kicks off March 26, and the big twist is how tight the competition gets: instead of one giant global board, you'll be dropped into a 50-player leaderboard made up of folks in your exact division. If you're testing settings in a CoD BO7 Bot Lobby or grinding real matches, you'll notice fast that every win matters more when the only people you're measured against are right beside you in the same bracket.


    How the 50-player boards change everything
    This format messes with your head in a good way. In regular Ranked, you can lose a match, shrug, and tell yourself you'll make it up later. Here, you can't hide. You're staring at the same names all week, watching someone leapfrog you because they went on a heater while you took a break. Gold players are battling other Gold players, same for Platinum and Diamond, and that makes each lobby feel personal. You'll quickly figure out who's consistent, who's stacking, and who's trying to brute-force the board by playing nonstop. It's not just "climb SR." It's "beat these 50 people before the clock runs out."


    The short window and the reward ladder
    You've got from March 26 to March 31, so there's not much runway. That's why everyone's calling it a sweat-fest. The prize structure is simple but brutal: place 1st and you get a unique emblem that basically screams "I was the best in my pocket." Place 2nd through 5th and you earn an animated camo tied to your rank, which is exactly the kind of thing that gets noticed in pre-game. Place 6th through 25th and it's a static camo plus an emblem. Place 26th through 50th and you still walk away with a Ranked Series emblem for competing. No weird loopholes, just placement.


    Warzone, Multiplayer, and the side challenges
    The nice part is you're not locked into one vibe. The event runs across both Warzone and Multiplayer, so you can play whatever you're actually good at. If you're a Resurgence demon, lean into that. If you're a Search player who lives for clutch rounds, stick to your lane. There's also a separate challenge track running alongside the leaderboard, letting you earn a series vinyl and a Ranked Series charm. It's quieter progress, but it's steady, and it gives you something to show even if your leaderboard turns into a knife fight.


    Getting ready without burning out
    Most players won't lose this event because they "can't aim." They'll lose it by tilting, swapping loadouts every other match, or chasing points at 2 a.m. when they're fried. Pick a couple of comfort guns, sort your comms, and be picky about when you queue. You don't need perfection, just fewer bad sessions. And if you're the type who likes dialing in movement and recoil before the real grind, a cheap CoD BO7 Bot Lobby can help you warm up faster so your first serious games of the week aren't wasted on rust.Welcome to U4GM, where Call of Duty 7 Ranked Series hype meets real, practical prep. From March 26–31 you've got a tight, brutal sprint: 50-player leaderboards matched to your division, stacked rewards, and Warzone + MP access. Want to warm up, sharpen your gunfights, and hit that climb feeling ready? Check https://www.u4gm.com/call-of-duty-black-ops-7/bot-lobbies then jump back in for emblems, rank camos, and that top-five flex. Play smart, keep it clean, and make every match count.
    U4GM Guide to CoD 7 Ranked Series March 26 to 31 Rewards Something's shifted in the Call of Duty 7 Ranked crowd this week. People aren't just "queueing up" anymore; they're checking stats, arguing over maps, and putting in extra reps like it's a tryout. The new Ranked Series kicks off March 26, and the big twist is how tight the competition gets: instead of one giant global board, you'll be dropped into a 50-player leaderboard made up of folks in your exact division. If you're testing settings in a CoD BO7 Bot Lobby or grinding real matches, you'll notice fast that every win matters more when the only people you're measured against are right beside you in the same bracket. How the 50-player boards change everything This format messes with your head in a good way. In regular Ranked, you can lose a match, shrug, and tell yourself you'll make it up later. Here, you can't hide. You're staring at the same names all week, watching someone leapfrog you because they went on a heater while you took a break. Gold players are battling other Gold players, same for Platinum and Diamond, and that makes each lobby feel personal. You'll quickly figure out who's consistent, who's stacking, and who's trying to brute-force the board by playing nonstop. It's not just "climb SR." It's "beat these 50 people before the clock runs out." The short window and the reward ladder You've got from March 26 to March 31, so there's not much runway. That's why everyone's calling it a sweat-fest. The prize structure is simple but brutal: place 1st and you get a unique emblem that basically screams "I was the best in my pocket." Place 2nd through 5th and you earn an animated camo tied to your rank, which is exactly the kind of thing that gets noticed in pre-game. Place 6th through 25th and it's a static camo plus an emblem. Place 26th through 50th and you still walk away with a Ranked Series emblem for competing. No weird loopholes, just placement. Warzone, Multiplayer, and the side challenges The nice part is you're not locked into one vibe. The event runs across both Warzone and Multiplayer, so you can play whatever you're actually good at. If you're a Resurgence demon, lean into that. If you're a Search player who lives for clutch rounds, stick to your lane. There's also a separate challenge track running alongside the leaderboard, letting you earn a series vinyl and a Ranked Series charm. It's quieter progress, but it's steady, and it gives you something to show even if your leaderboard turns into a knife fight. Getting ready without burning out Most players won't lose this event because they "can't aim." They'll lose it by tilting, swapping loadouts every other match, or chasing points at 2 a.m. when they're fried. Pick a couple of comfort guns, sort your comms, and be picky about when you queue. You don't need perfection, just fewer bad sessions. And if you're the type who likes dialing in movement and recoil before the real grind, a cheap CoD BO7 Bot Lobby can help you warm up faster so your first serious games of the week aren't wasted on rust.Welcome to U4GM, where Call of Duty 7 Ranked Series hype meets real, practical prep. From March 26–31 you've got a tight, brutal sprint: 50-player leaderboards matched to your division, stacked rewards, and Warzone + MP access. Want to warm up, sharpen your gunfights, and hit that climb feeling ready? Check https://www.u4gm.com/call-of-duty-black-ops-7/bot-lobbies then jump back in for emblems, rank camos, and that top-five flex. Play smart, keep it clean, and make every match count.
    0 Reacties 0 aandelen 555 Views 0 voorbeeld
  • U4GM Where to Play The Butcher in Season 12 Gea Kul Ruin

    Season 12 hit like a curveball. No slow ramp-up, no comfy routine, just a weird new loop that grabs you by the collar and drags you in. The headline change is the Ruin of Gea Kul, and it's not "your build, but stronger." It's a role swap. You load in as The Butcher, not your usual class, and it changes how you think about the grind. Even the way you judge drops feels different, especially if you've been comparing Diablo 4 Items and trying to figure out what actually matters this season.


    Playing the monster changes everything
    You're not rescuing villagers or chasing a quest marker. You're stalking Wanderers, and they're basically twisted mirrors of the heroes we've all played for years. A shield-heavy Paladin who won't stop bracing. A Necromancer who tries to box you in with bone walls. A Sorceress who keeps backing up, freezing the floor, and daring you to step wrong. It feels personal in a way normal dungeons don't. As The Butcher, you live in close range. You commit. "Fresh Meat" isn't just a catchphrase, it's the whole tempo. Miss your angle, whiff a charge, or let them reset the fight and you'll feel it fast.


    Kill streaks aren't a flex, they're oxygen
    The dungeon's pacing pushes you to keep moving, because your kill streak is basically your safety net. Keep it up and you're rolling—healing, pressure, momentum. Drop it and the room suddenly belongs to them. Players are already learning the hard way that these squads kite like real people. They'll split, bait corners, and chain crowd control until you're stuck waddling after them. The trick is picking the right target first, forcing panic, and not chasing into a bad lane. If you've ever yelled "stop running" at an elite, this mode is that feeling turned into a full activity.


    Hunger affixes make loot feel like a plan
    The new "bloodied" gear and the Hunger affix system is where the long-term hook sits. It rewards aggression, but not in a brainless way. The Devilish Ensorcelled Ring is the clean example: higher streak, better stats—Strength bumps, sturdier resistances, and life on hit that keeps you upright when the room's trying to delete you. Some legendary powers also create these little combos that change your route through the fight, like kicking up Dust Devils after you spend Fury. It's not just "more damage." It's "how do I stay in control for another thirty seconds."


    What the Ruin hints at next
    There's also this quiet drip of lore and item text tucked into the Ruin that's got people side-eyeing the future. The Warlock talk isn't coming from nowhere, and it's starting to feel less like wishful thinking and more like breadcrumbs. Either way, Season 12's design has that rare "try it once and you'll get it" energy, especially if you like experimenting with builds or gearing paths without waiting weeks for power creep to kick in. And if you're the type who'd rather skip some of the friction and just get straight to upgrading, a lot of players lean on U4GM for buying game currency and items so they can spend more time in the Ruin and less time staring at empty stash tabs.At U4GM, we're all about making Season 12 feel less grindy and more "Fresh Meat" chaos. If you're taking The Butcher into the Ruin of Gea Kul and those Paladin/Necro/Sorc/Rogue squads are wrecking your streak, gear up smart at https://www.u4gm.com/diablo-4/items and keep those Hunger-affix bonuses rolling for cleaner clears and better loot drops.
    U4GM Where to Play The Butcher in Season 12 Gea Kul Ruin Season 12 hit like a curveball. No slow ramp-up, no comfy routine, just a weird new loop that grabs you by the collar and drags you in. The headline change is the Ruin of Gea Kul, and it's not "your build, but stronger." It's a role swap. You load in as The Butcher, not your usual class, and it changes how you think about the grind. Even the way you judge drops feels different, especially if you've been comparing Diablo 4 Items and trying to figure out what actually matters this season. Playing the monster changes everything You're not rescuing villagers or chasing a quest marker. You're stalking Wanderers, and they're basically twisted mirrors of the heroes we've all played for years. A shield-heavy Paladin who won't stop bracing. A Necromancer who tries to box you in with bone walls. A Sorceress who keeps backing up, freezing the floor, and daring you to step wrong. It feels personal in a way normal dungeons don't. As The Butcher, you live in close range. You commit. "Fresh Meat" isn't just a catchphrase, it's the whole tempo. Miss your angle, whiff a charge, or let them reset the fight and you'll feel it fast. Kill streaks aren't a flex, they're oxygen The dungeon's pacing pushes you to keep moving, because your kill streak is basically your safety net. Keep it up and you're rolling—healing, pressure, momentum. Drop it and the room suddenly belongs to them. Players are already learning the hard way that these squads kite like real people. They'll split, bait corners, and chain crowd control until you're stuck waddling after them. The trick is picking the right target first, forcing panic, and not chasing into a bad lane. If you've ever yelled "stop running" at an elite, this mode is that feeling turned into a full activity. Hunger affixes make loot feel like a plan The new "bloodied" gear and the Hunger affix system is where the long-term hook sits. It rewards aggression, but not in a brainless way. The Devilish Ensorcelled Ring is the clean example: higher streak, better stats—Strength bumps, sturdier resistances, and life on hit that keeps you upright when the room's trying to delete you. Some legendary powers also create these little combos that change your route through the fight, like kicking up Dust Devils after you spend Fury. It's not just "more damage." It's "how do I stay in control for another thirty seconds." What the Ruin hints at next There's also this quiet drip of lore and item text tucked into the Ruin that's got people side-eyeing the future. The Warlock talk isn't coming from nowhere, and it's starting to feel less like wishful thinking and more like breadcrumbs. Either way, Season 12's design has that rare "try it once and you'll get it" energy, especially if you like experimenting with builds or gearing paths without waiting weeks for power creep to kick in. And if you're the type who'd rather skip some of the friction and just get straight to upgrading, a lot of players lean on U4GM for buying game currency and items so they can spend more time in the Ruin and less time staring at empty stash tabs.At U4GM, we're all about making Season 12 feel less grindy and more "Fresh Meat" chaos. If you're taking The Butcher into the Ruin of Gea Kul and those Paladin/Necro/Sorc/Rogue squads are wrecking your streak, gear up smart at https://www.u4gm.com/diablo-4/items and keep those Hunger-affix bonuses rolling for cleaner clears and better loot drops.
    0 Reacties 0 aandelen 565 Views 0 voorbeeld
Sponsor
Camperbook.eu https://camperbook.eu