Buy Verified Cash App Account – Complete Guide for Beginners
Email: contact.smmproit@gmail.com
Telegram: @smmproit
Whatsapp:+1(818)278-2627
https://smmproit.com/product/buy-verified-cash-app-accounts/
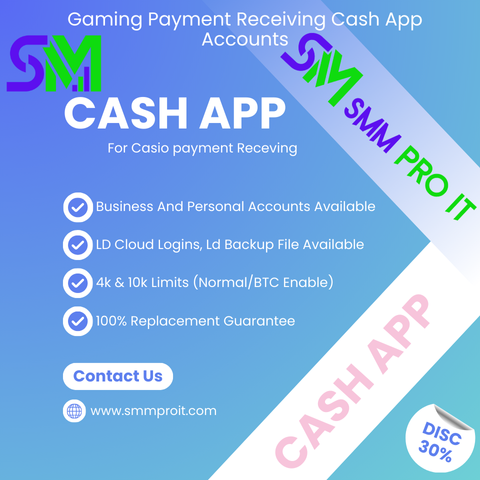
In today’s digital world, people want fast and secure ways to handle money online. That is why many users look to buy verified cash app account options for personal use, gaming business payments, creator tools, live stream income, and financial transactions.
A verified cash app account gives users better access, higher transaction limits, stronger trust, and premium services. Whether you run a gaming business, work as a game host, manage creators upload systems, or need uninterrupted listening upfront tracklists for music streaming, verified accounts can make life easier.
Many people now buy verified cash app accounts because they save time and unlock additional features quickly. From bank account linking to Bitcoin access, a verified account offers much more than unverified accounts.
What Is a Verified Cash App Account?
A verified account is a Cash App profile that has completed identity verification. This process normally includes adding a phone number, linking a bank account, and submitting a government-issued ID.
With verification, users can access:
Higher transaction limits
Bitcoin features
Premium services
Better security
More trust during transactions
Faster financial transactions
Unverified accounts often come with restrictions. That is why many users prefer to buy a verified cash app account instead of spending time waiting for approval.
How Does Cash App Work?
Cash App is a mobile payment platform that allows users to send and receive money instantly.
People use cash app accounts for:
Paying friends
Shopping online
Gaming business payments
Live streaming broadcast music
Creator tools creator tools access
Tips & subscriptions stats use listener insights
Buying Bitcoin
Sending money internationally
The app connects directly to your bank account and phone number for quick transfers.
Think of it like a digital wallet in your pocket. Instead of carrying cash, your money moves online in seconds.
Why Verification Matters
Verification improves trust and security. It also unlocks more services and removes many restrictions.
With verified cash app accounts, users can enjoy:
Higher transaction limits
BTC enabled access
Unlimited uploads share infinite options
Safer transactions
Better support
Premium services
Additional features
For gaming businesses and creators upload systems, verification is almost essential.
Why Should You Buy Verified Cash App Accounts for Your Gaming Business?
Gaming businesses move fast. Players buy items, subscribe to services, and send money every day. A verified cash app account helps handle these payments smoothly.
Imagine trying to run a game host service with limited transaction ability. It would feel like driving a sports car with the brakes on.
That is why many gaming businesses buy verified cash app accounts.
Fast Financial Transactions
Speed matters in gaming. Nobody wants delays when buying upgrades or making subscriptions.
Verified cash app accounts allow:
Faster payments
Better access to money
Easy financial transactions
Smooth live stream donations
Quick adverts enjoy promotions
Gaming businesses can receive money instantly without interruption.
Better Trust with Players
Trust is everything online.
When customers see a verified account, they feel safer sending money. Verified cash app accounts create a professional image and help gaming businesses grow faster.
This trust can improve:
Transactions
Customer loyalty
Access to premium services
Long-term business success
The Positive Side of Buy Verified Cash App Accounts
There are many reasons people choose buying verified cash app account services.
Some of the biggest advantages include convenience, speed, and access to more features.
Higher Transaction Limits
Unverified accounts have limited sending and receiving amounts.
Verified accounts unlock higher transaction limits so users can:
Send more money
Receive larger payments
Handle business transactions
Manage creators upload income
This is especially useful for gaming businesses and live stream creators.
Access to Premium Services
A verified account unlocks premium services like:
Bitcoin access
Better customer support
Faster transfers
Offline listening download tools
Live streaming broadcast music
Creator tools
These additional features help businesses and creators grow.
Benefits of Owning Buy Verified Cash App Accounts for Gaming Business
Owning verified cash app accounts gives gaming businesses more control and flexibility.
Buy Verified Cash App Account – Complete Guide for Beginners
Email: contact.smmproit@gmail.com
Telegram: @smmproit
Whatsapp:+1(818)278-2627
https://smmproit.com/product/buy-verified-cash-app-accounts/
In today’s digital world, people want fast and secure ways to handle money online. That is why many users look to buy verified cash app account options for personal use, gaming business payments, creator tools, live stream income, and financial transactions.
A verified cash app account gives users better access, higher transaction limits, stronger trust, and premium services. Whether you run a gaming business, work as a game host, manage creators upload systems, or need uninterrupted listening upfront tracklists for music streaming, verified accounts can make life easier.
Many people now buy verified cash app accounts because they save time and unlock additional features quickly. From bank account linking to Bitcoin access, a verified account offers much more than unverified accounts.
What Is a Verified Cash App Account?
A verified account is a Cash App profile that has completed identity verification. This process normally includes adding a phone number, linking a bank account, and submitting a government-issued ID.
With verification, users can access:
Higher transaction limits
Bitcoin features
Premium services
Better security
More trust during transactions
Faster financial transactions
Unverified accounts often come with restrictions. That is why many users prefer to buy a verified cash app account instead of spending time waiting for approval.
How Does Cash App Work?
Cash App is a mobile payment platform that allows users to send and receive money instantly.
People use cash app accounts for:
Paying friends
Shopping online
Gaming business payments
Live streaming broadcast music
Creator tools creator tools access
Tips & subscriptions stats use listener insights
Buying Bitcoin
Sending money internationally
The app connects directly to your bank account and phone number for quick transfers.
Think of it like a digital wallet in your pocket. Instead of carrying cash, your money moves online in seconds.
Why Verification Matters
Verification improves trust and security. It also unlocks more services and removes many restrictions.
With verified cash app accounts, users can enjoy:
Higher transaction limits
BTC enabled access
Unlimited uploads share infinite options
Safer transactions
Better support
Premium services
Additional features
For gaming businesses and creators upload systems, verification is almost essential.
Why Should You Buy Verified Cash App Accounts for Your Gaming Business?
Gaming businesses move fast. Players buy items, subscribe to services, and send money every day. A verified cash app account helps handle these payments smoothly.
Imagine trying to run a game host service with limited transaction ability. It would feel like driving a sports car with the brakes on.
That is why many gaming businesses buy verified cash app accounts.
Fast Financial Transactions
Speed matters in gaming. Nobody wants delays when buying upgrades or making subscriptions.
Verified cash app accounts allow:
Faster payments
Better access to money
Easy financial transactions
Smooth live stream donations
Quick adverts enjoy promotions
Gaming businesses can receive money instantly without interruption.
Better Trust with Players
Trust is everything online.
When customers see a verified account, they feel safer sending money. Verified cash app accounts create a professional image and help gaming businesses grow faster.
This trust can improve:
Transactions
Customer loyalty
Access to premium services
Long-term business success
The Positive Side of Buy Verified Cash App Accounts
There are many reasons people choose buying verified cash app account services.
Some of the biggest advantages include convenience, speed, and access to more features.
Higher Transaction Limits
Unverified accounts have limited sending and receiving amounts.
Verified accounts unlock higher transaction limits so users can:
Send more money
Receive larger payments
Handle business transactions
Manage creators upload income
This is especially useful for gaming businesses and live stream creators.
Access to Premium Services
A verified account unlocks premium services like:
Bitcoin access
Better customer support
Faster transfers
Offline listening download tools
Live streaming broadcast music
Creator tools
These additional features help businesses and creators grow.
Benefits of Owning Buy Verified Cash App Accounts for Gaming Business
Owning verified cash app accounts gives gaming businesses more control and flexibility.